
If you sell digital products, training, virtual (or in-person) coaching, or a SaaS (software as a service), then you'll need a way to process your customers' payments.
Now there are traditional payment processors out there – the types used for standard retail situations… and there are payment processors that are more focused in the online space. But one thing I've noticed a lot of my students and clients misunderstand is the difference between a payment processor and more robust checkout or shopping cart systems.
Online payment processors, like PayPal or Stripe are terrific for receiving payments, and they can even do some sophisticated stuff like manage recurring payments (and you can even send invoices if you've got the right setup in place). But where they fall short is in their ability to manage bigger picture stuff.
I learned this first-hand when I was trying to integrate PayPal with product delivery and add my new customers to an email list at the same time. I spent hours watching YouTube videos and reading forum discussions looking for the right combination of integrations to make everything work together.
Moving Beyond PayPal and Stripe
Then I discovered shopping carts and checkout platforms, and have been using them to manage my business ever since.
If you're not sure what these are, here's a quick overview. Most shopping cart and checkout platforms provide you with most of the following:
• A way to get paid by your clients & customers
• A secure & trustworthy way of getting paid
• A way to easily integrates with your website
• A way to track your customers’ purchases over time
• A way to build your affiliate program
• A way to communicate with customers through the autoresponder
Now, this is by no means an exhaustive list of features, but it gives you an idea of what possibilities exist beyond the simplicity of processing a payment.
My History With Shopping Carts
To date, I've used several different tools, including with 1Shopping Cart, Amember, JVZoo, Zaxaa, and WarriorPlus. Each one has been too heavily focused in one area… like membership sites or affiliates, and none has offered broad enough integrations into many of the tools or software that I tend to use in other parts of my business.
But, perhaps the most important features I was looking for were related to systematically selling more products. By which I mean that I wanted ways to increase the average ticket price of each order – by using order bumps, upsells, or other devices to get people to spend more.
There are just a few software platforms on the market that have these kinds of features, and I've had the opportunity to take three of them for a test drive. All are really solid contenders, but after trying SamCart, PayKickstart, and ThriveCart, I selected the latter for my business.
Why ThriveCart above the others?
In short, the platform is built to support a broader user-base than the other two. For example, SamCart and PayKickstart are primarily designed to handle digital products. In addition, they appear more limited with their integrations, whereas ThriveCart has proactively designed their platform to integrate with just about any other tool online.
Finally, after watching dozens of leaders in my industry (digital marketing) transition their businesses to ThriveCart, I decided to take the plunge and move mine there as well. Now that I'm inside, I can't imagine any other tool.
A Step-By-Step Guide To Setting Up A New Product Inside ThriveCart
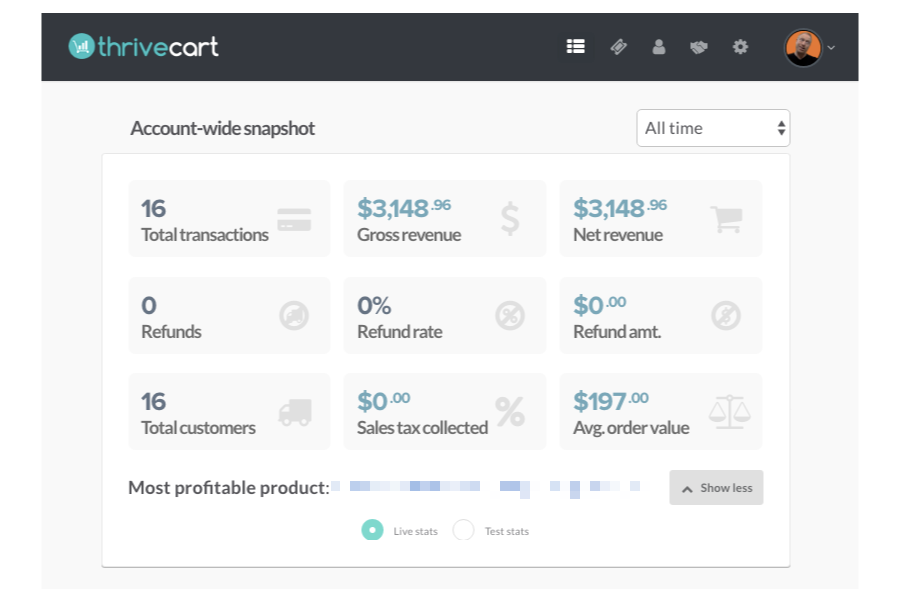
When you first log into your ThriveCart account, you'll see your general dashboard for your account. This is a great place to get a general summary of how your sales are going. There are plenty of ways to customize this view as well, including viewing custom dates and looking at one product at a time.
When you scroll down the page, you'll see a list of all your products.
Notice the tabs at the top of this section? They list products (which would be your front-end in an offer funnel) as well as upsells, downsells, and A/B tests (which would compare two products to see which is most successful at achieving a specific goal you define).
For the purposes of this ThriveCart tutorial, we'll focus on creating the details for a front-end product. But know that the same general process applies to all types of products no matter where they appear in the funnel.
To get started, you simply click the big blue “create new product” button.

On the next screen, you'll be given the opportunity to fill in all the product details, starting with the product name. You'll also have the ability to define how many are available to be sold. Some products, like spaces in a virtual coaching group for example, will be limited, while others, like online courses, can be set sell as many as possible.
You'll notice in this screenshot that I've set the product status to “live.” By default, all products are set to “test mode” so you'll have the opportunity to fully test your checkout process before you start active selling. This is one feature that ThriveCart makes very simple to manage.

The next screen is where you'll define the pricing for your product. As of the time of my posting this, there are 17 different currencies inside ThriveCart. New ones are added based on user demand.
Pricing can be set up as a one-time fee, subscription, split-pay, or pay-your-own price. In the following screenshot, you can see that I've set up a subscription pricing model with a 14 day trial for $1 followed by a recurring monthly amount of $37 with no end-date defined.

One of the features I really love inside ThriveCart is the order bump. Unlike an upsell, an order bump is a chance to offer something special inside the checkout page that will enhance their purchase. All the customer need to do is check the box and they've added another product to their purchase.
Oh, and you can fully customize the text on the order bump.

Further down the page, you can define which payment processing options your account will support on a product-by-product basis. This allows you to accept credit cards via Stripe or Authorize.net as well as PayPal and ApplePay.
Setting up your payment integrations with these services is very straightforward. ThriveCart includes a video walkthrough for each platform.

Once your payment details have been defined, you'll need to tell ThriveCart where to send your new customer. On this screen, they ask for an email or URL where you provide customer support. In addition, you'll need to enter a page where customers can access what they've just purchased (or at least display a message telling them an email will be sent with access details).
If, for any reason, you don't have your own “success” page built, ThriveCart provides the ability to create one inside the checkout page design (which we'll look at in a moment).

ThriveCart offers a few standard checkout page designs. At first, I thought this was a limitation, but there's been a lot of discussion in the ThriveCart Facebook Group about how well these pages have been streamlined to provide the highest conversions possible.
Checkout page options include one- and two-step checkout pages, as well as pages you can embed onto your own website and pop-up checkout forms that can be placed on sales pages, blog posts, or anywhere else where you can embed the code.

After you've selected the type of checkout page you want for your product, you can customize the various sections of the page. ThriveCart gives you the ability to include a countdown timer, guarantee seal, box shot, product bullet points, testimonials, and more – all of which help move your prospective customer toward making a purchase.

In each of these sections, you have the ability to customize fields and define what to include and what not to include. On most of my forms, I collect as little information from my customers as possible (making the checkout process more friction-free for them). In this case, I've chosen to only ask for their name and email address.

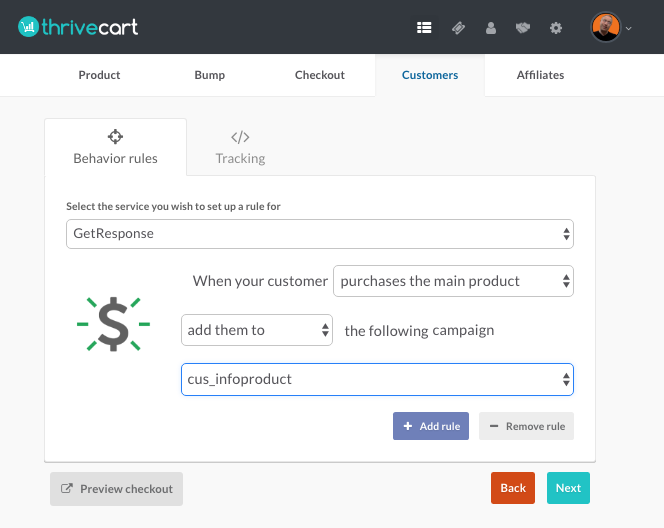
Once they've completed a purchase, ThriveCart allows me to define behavioral rules like what email list to add them to. I can also add tracking codes at this point to track conversions from ads or allow me to compile a custom audience for reatrageting ads (to people who haven't bought).
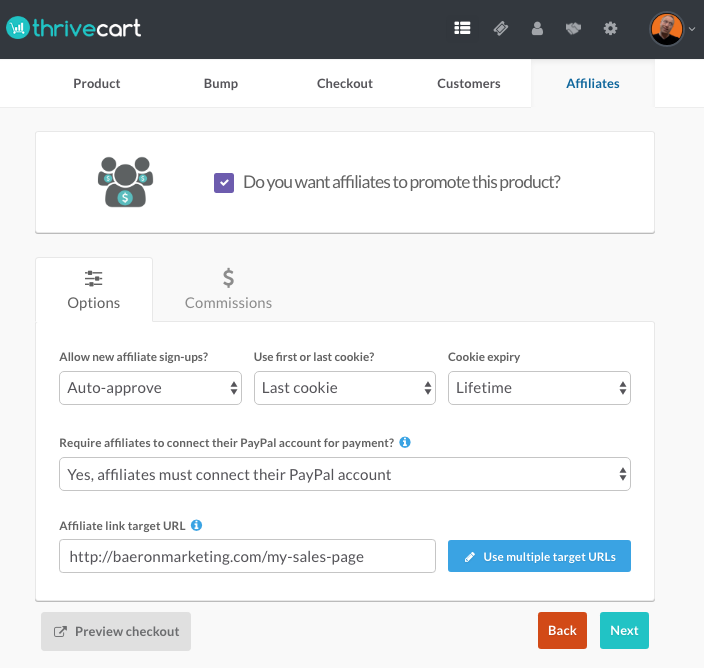
And, since much of my business runs on the support of affiliates, who drive traffic to my offers, I use ThriveCart to manage and automatically pay my affiliates.
Affiliate management happens at the product level as well as the account level, meaning I can manage and run reports on my affiliates in more details than what you can see here.
In this case, I have set up the product to pay the last affiliate who sent traffic to the page to be cookied (you can also cookie the first affiliate to do so), and I've set the cookie to never expire.
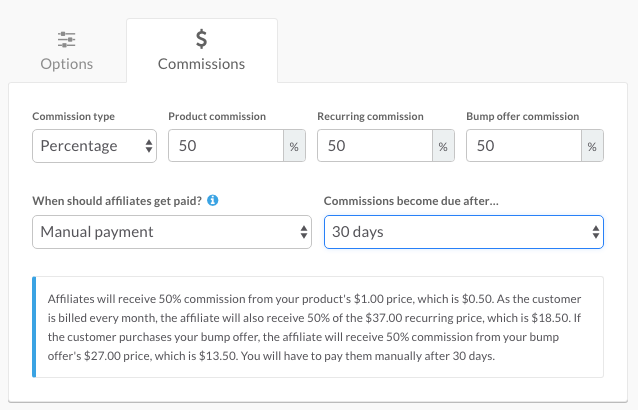
On the next tab, I've defined how much the affiliate gets paid, and when. Payments can be set to automatically be made or the can be paid manually if you'd like to review things first.
Finally, here's what one of my checkout pages looks like. In this case, it's selling a course on Google Adwords with an order bump for my Google Analytics course. I sell each course for $97, but because these two topics appeal to the same audience, I cross-sell the other course on the checkout page as an order bump (now you know my secret).

Overall, I'm a huge fan of what the folks at ThriveCart are doing.
They're terrifically responsive to me through their support desk when I need help. They have excellent tutorials on using their product. They've developed a loyal and active community inside Facebook. And they have a transparent and robust feature request process.
So, if you're thinking of adding a checkout platform to your online sales process (or looking to replace your current one), check out ThriveCart here. I think you'll be glad you did.